Biomes
Biomes are curated plant ecosystems ready to scatter in Blender using Geo-Scatter or Biome-Reader.
👉 For an overview of how Biomes compare to Collections, see: Biomes & Collections Overview.
Where to find Biomes

Click the icon in the main interface to open the Biomes & Collections browser, where you can preview and manage available biomes.
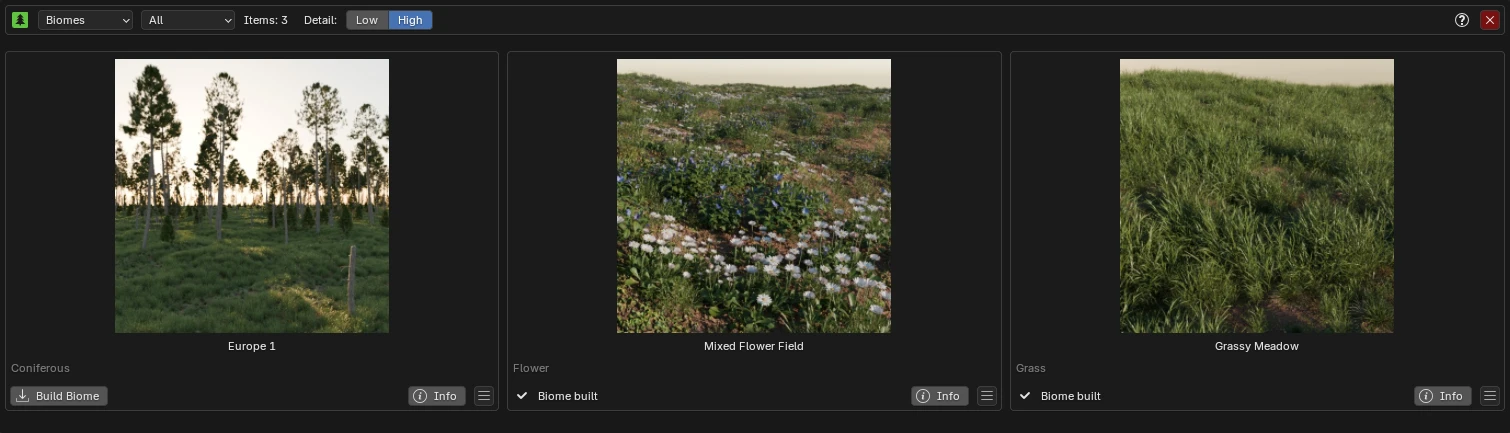
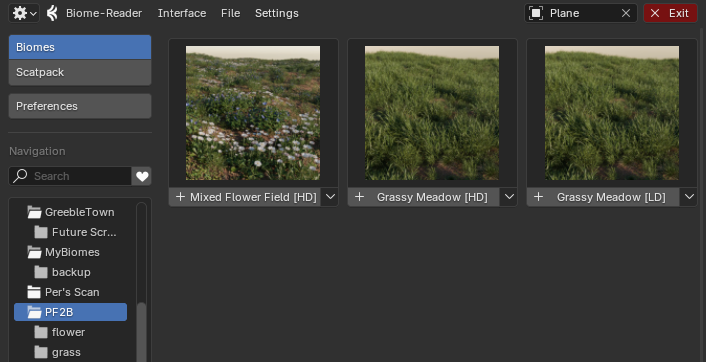
Browse Biomes
At the top left of the browser, you can select the biome category.
You also have the Detail selection, which lets you choose either Low or High detail level. Low Detail biomes should primarily use LD plants, while High Detail biomes should primarily use HD plants. Some variation is allowed, but this serves as a general guideline.
If a biome is already built and available in your library, the Build Biome button will be replaced by a Biome Built label.
Available Actions
- Build Biome: See Building a Biome.
- INFO: Displays information about the biome. See Info Popup.
- Preview Biome: Click the biome name to open a larger preview image.
- Menu:
- Add plants to queue: Adds these plants to your queue. This will erase all current items in your queue.
- Check Installed Plants: Checks which plants you already have imported in your library. See Installed Plants Popup.
- Open Biome Folder: Available once the biome is built. Opens the specific biome folder located at:
C:\Users\%userprofile%\AppData\Roaming\Blender Foundation\Blender\data\scatter library\_biomes_\PF2B - Remove Biome: Remove all biome files. NOTE: This only removes the biome files. It does NOT remove the plants themselves stored in your biome .blend files.
-
Exit: Restores the native Blender Preferences interface. To close the browser entirely, use the native button.
Clicking the red button only restores the native Blender Preferences window that is temporarily used by the PF2B Browser.
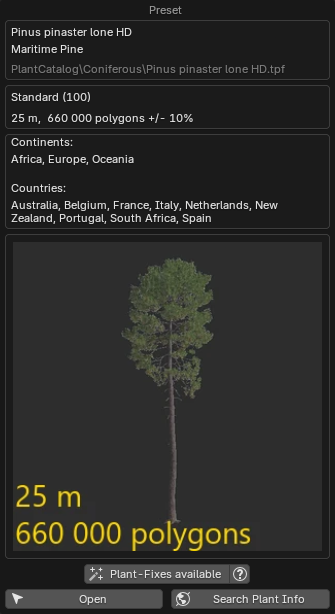
Info Popup
The Info Popup provides details about the selected biome. It shows the plants included in the biome, and you can click the info button next to a plant to view more details about it.
Installed Plants Popup
Similar to the regular Info Popup, but this one checks whether the actual plants are present in your library. There are two options:
Verifies which plants from the biome are already imported and stored in your biome .blend library files.
Note: This check only looks at the root folder defined in PF2B Preferences > Plant Library > Blend Storage. If you have moved your blend files elsewhere or into subdirectories, they may appear in red in this popup. However, they will still work in the biome as long as the blend files are inside your Asset Library, where Geo-Scatter or Biome-Reader can find them.
Checks whether the plants in the biome are installed in your PlantCatalog library on disk, regardless of whether they are in the biome .blend files.
If a plant is missing, run Re-Index Plants under PF2B Preferences > Misc.
Building a Biome
Before You Start
When building biomes, you must start from a new/empty scene. The scene is used as a temporary location for the imported plants, so do not run Build Biome in a project with existing work you want to keep.
When you click Build Biome, PF2B will:
- Export plants from PlantFactory based on the biome definition.
- Store the exported models in
.blendfiles within your Asset Library. - Prepare biome-specific files required by Geo-Scatter or Biome-Reader.
Once the process is complete, the biome becomes available in the scattering plugin of your choice. You can then scatter it in your Blender scene to generate rich, natural environments:

Using Biomes

🎥 The video above gives a quick overview of Biome functionality. 👉 For detailed step-by-step instructions on using Geo-Scatter or Biome-Reader, please check www.geoscatter.com
Tips
- When adding biomes to the scene, check the Future Display setting under Settings (Biome-Reader) or ScatterOptions (Geo-Scatter). Set it to
Set biome(s) "Display As"so the biome uses the display settings defined by the biome creator.
Using LODs with Geo-Scatter
This section applies only to Geo-Scatter. Biome-Reader does not support LODs.
If you need more performance in the viewport, you can use the Level of Detail functionality introduced in Geo-Scatter 5.6. You'll find it under Viewport > Level of Detail.
Setup Steps
-
Import LODs in PF2B
- Navigate to the LOD Importer utility in PF2B.
- Choose between:
All Plants in Scene(import LODs for every plant)Selected Plants(import only for the plants you select in the Geo-Scatter Import collection via the Outliner).
- Enable the Use Biome Naming checkbox. This ensures plants are renamed using the standard format
PlantName [Preset|DetailLevel]LOD, so that Geo-Scatter can correctly identify them for the Auto Setup LODs function. - Check the LOD tickboxes for the levels you want to bring in.
- Click Import.
-
Enable in Geo-Scatter
- In the Geo-Scatter panel, first select the layer you want to optimize.
- With that layer selected, open
Viewport > Level of Detailfor the layer and click Auto Setup to link the imported LODs.
-
Fine-Tune
- Adjust the Transition settings to your preference for smoother LOD switching.
Once configured, you’ll notice a more responsive viewport.
Note
The LOD feature mainly benefits viewport performance and rarely improves render times.
For best results, set the Visibility State as shown below so that LODs are active only in the viewport and not during rendering: 